Checked against the product’s code on 7 November 2026.
Open Privacy & Data to review consent, including when to ask permission before tracking people, and handle visitor records. Use an Admin account for personal visitor data. See Privacy and consent for the explanation of the consent model.
Review the consent policy
Section titled “Review the consent policy”Opt-in waits for acceptance of the relevant use of data. Opt-out starts with the allowed defaults until the visitor refuses. Global Privacy Control is a browser signal asking the site to restrict data use.
- Open Consent.
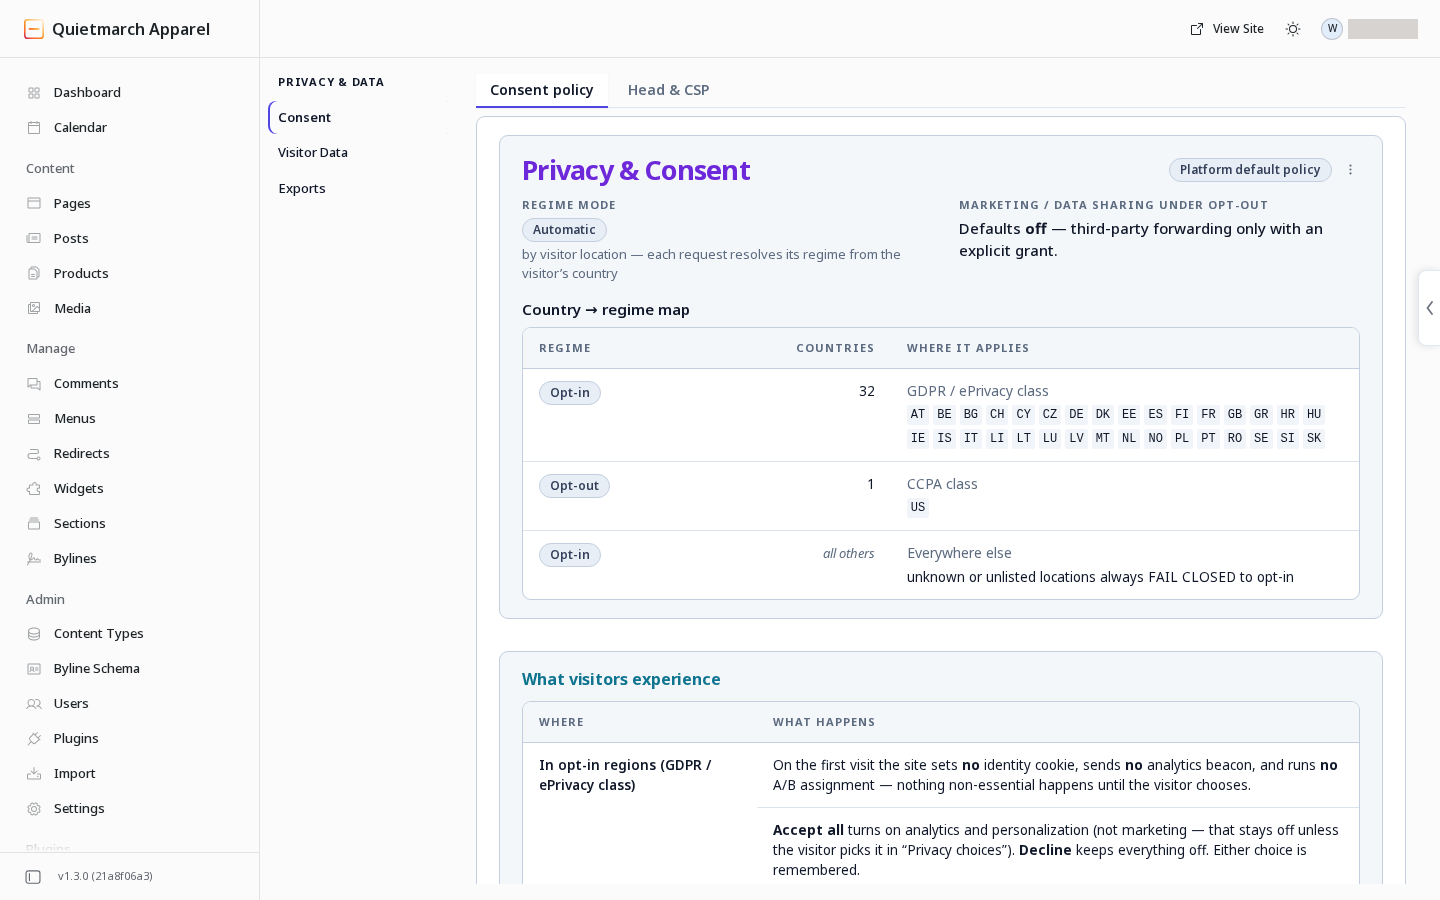
- Read Consent policy. Check whether the policy follows visitor location or forces one setting everywhere, the country map, Everywhere else and the marketing default under opt-out.
- Read What visitors experience for the corresponding visitor choices.
Accept all grants what the banner names, and the banner names marketing only on a page that declares English and only on a site that shares. Global Privacy Control still refuses.
Under the platform default, unlisted or unknown locations use opt-in. A more specific regional rule takes precedence over its country rule. Global Privacy Control overrides both the defaults and a recorded acceptance.
The consent page is read-only. To change the policy:
- Open the copilot and describe the policy you want. For example, ask it to require opt-in everywhere if that is your chosen policy.
- Read Change this site’s consent policy? Check the locations, purposes and effect.
- Choose Change the policy to approve, or Keep the current policy to decline.
- Return to Consent and review the result. If the page could not refresh, use its refresh action before relying on the old display.
An approved policy changes the saved consent settings. An already open page or older stored copy can still show the earlier notice. Ask the copilot to undo the change to restore the earlier policy. Review the public site’s Privacy choices after changing the configuration.
Check recorded personalization reach by country
Section titled “Check recorded personalization reach by country”Use this to understand where personalization reached recorded visitors, rather than estimate everyone who visited.
- Ask the copilot: “How many visitors did personalization reach by country in the last 28 days?”
- Read the period and the newest counted record’s time.
- Compare each country’s count with its shown consent rule. The rules come from today’s policy.
- Read the grouped other countries as well as the named rows.
The question is read only and needs no approval. You can request 1 to 90 days; the default is 28. Countries with fewer than five reached visitors are grouped rather than named, with at most twenty countries named separately.
Visitors who refused, sent Global Privacy Control or had not answered where the site asks first are not recorded. The counts cannot show what share of all visitors personalization reached. See Consent and reach requests.
Event retention
Section titled “Event retention”Visitor events are kept with no limit until you set a retention period. Once you set one, events older than it are deleted on the site’s regular scheduled run, but only after an archive export has covered them.
Open Privacy & Data > Exports > Retention to set or change how long each kind of event is kept. Review the approval before saving a period. Leaving a kind’s period empty keeps its events without a limit.
Export site datasets
Section titled “Export site datasets”A site export is separate from one visitor’s export.
- Open Privacy & Data.
- Open Exports.
- Choose Export a range.
- Fill From (inclusive).
- Fill To (inclusive).
- Select the Datasets you need.
- Continue to the approval step.
- Read Export this site’s data for download?, including the range and datasets.
- Choose Approve & export only when its scope is right.
- Read the result under Run history.
- Open Downloads for that run.
- Choose Download everything (.zip) to obtain its complete files.
The datasets cover events, decisions, goals, audience transitions, audiences, profiles, consent and daily rollups. Files are compressed NDJSON, a text format with one JSON record per line, plus a manifest listing the export’s files. Daily rollups are summaries grouped by day. A schedule requires the feature to be available for the account. Rerunning a range can replace its stored export files; read that consequence before approving. A file already downloaded cannot be recalled.
Exports and event retention are separate settings. See Event retention for when old captured events are deleted.
Find the visitor record
Section titled “Find the visitor record”-
Open Visitor Data.
-
Enter an email, user id, visitor id or person id.
-
Choose Search.
-
Open the matching browser record. One person can have more than one linked browser.
-
Use Journey, Identity, Interests and audiences or Decisions to understand the record. Data held shows the stored data and consent choices.
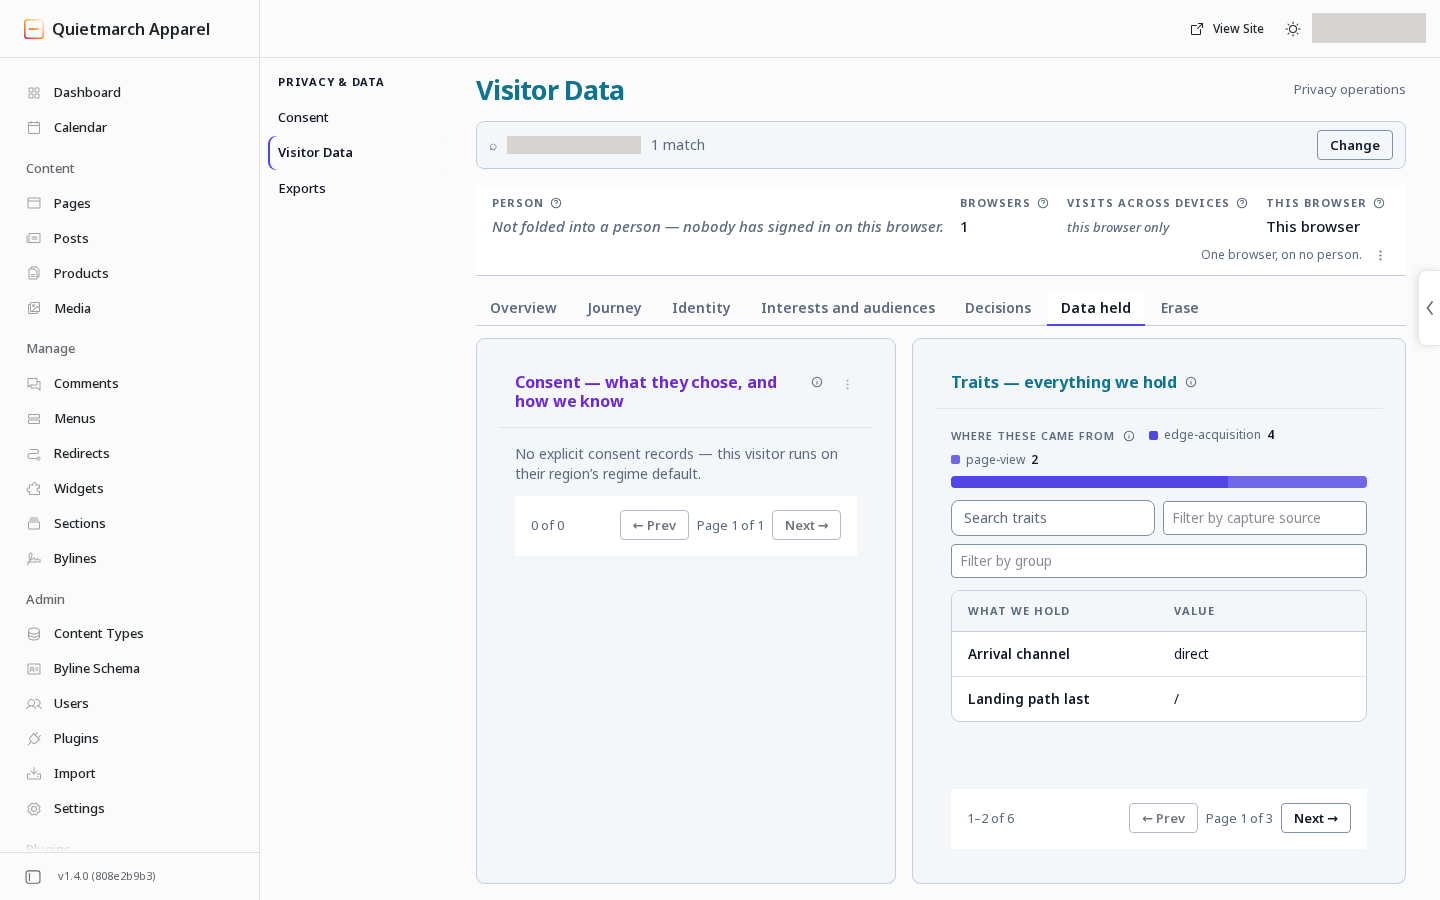
What the site holds for one browser.
Check the browser identity before choosing an export or erasure. These operations have different reach.
Export the record
Section titled “Export the record”- Open Erase on the browser record. The export controls are on this tab alongside the erasure controls.
- Choose Export this visitor’s data.
- Read the scope notice.
- Choose Export this visitor’s data again to draw the approval card.
- Read Export this visitor’s data? Check the time range, linked browsers and any data withheld for lack of consent.
- Choose Approve & export, or Don’t export to cancel.
- Read the receipt.
- Open Privacy & Data.
- Open Exports.
- Find the run under Run history.
- Open Downloads.
- Choose Download everything (.zip) for the complete run.
An export can reach beyond this browser to the linked browsers named in the card. A file already downloaded cannot be recalled.
Erase one browser’s data
Section titled “Erase one browser’s data”- Open Erase.
- Review the inventory of what will be removed.
- Choose Erase this visitor permanently.
- Read the scope and permanence notice.
- Choose the same control again to open the approval card.
- Read Permanently erase this visitor’s data? Check the exact browser record.
- Choose Erase permanently to proceed, or Keep the data to cancel.
- Read the receipt, including the result of resetting the visitor’s live state.
Erasure has no Undo. It removes the selected browser’s visitor data; it does not automatically erase the person’s other browsers. Search result checkboxes let you select several browser records for one approval card that names all of them.
Commerce orders remain, with their visitor link removed. This action does not delete the order’s customer details or the shopper’s account. Treat the export and erasure cards as statements of their exact scope.
Your next step
Section titled “Your next step”Review counting and identity before interpreting a visitor’s records or combining them with another dataset.